
How to Embed Your Face Picture or Message in an AI Photo!
In this article, we will walk you through the steps to unveil hidden photos in your images, a process that involves blending the hidden meaning in the photos with the Artificial Intelligence (AI).
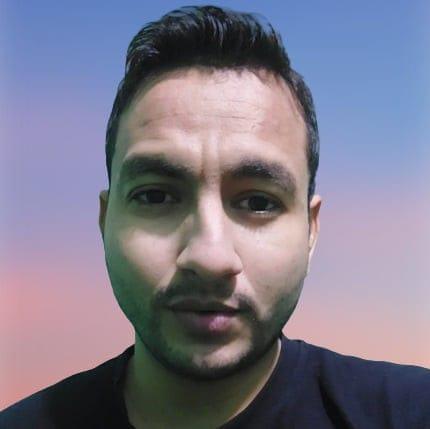
Step 1: Get Your Selfie
To embark on this journey of hidden photos, the first step is to choose the selfie or face pic that you want to use as your base image or embed in the AI Generated photo.
For example, as here I am choosing mine here:
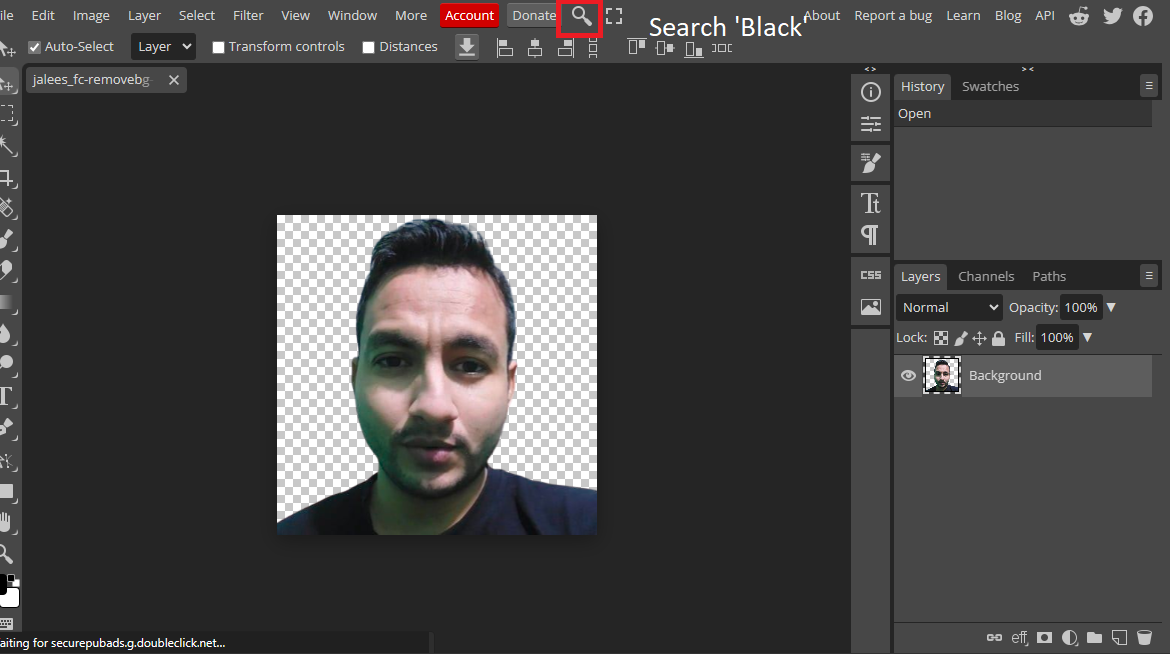
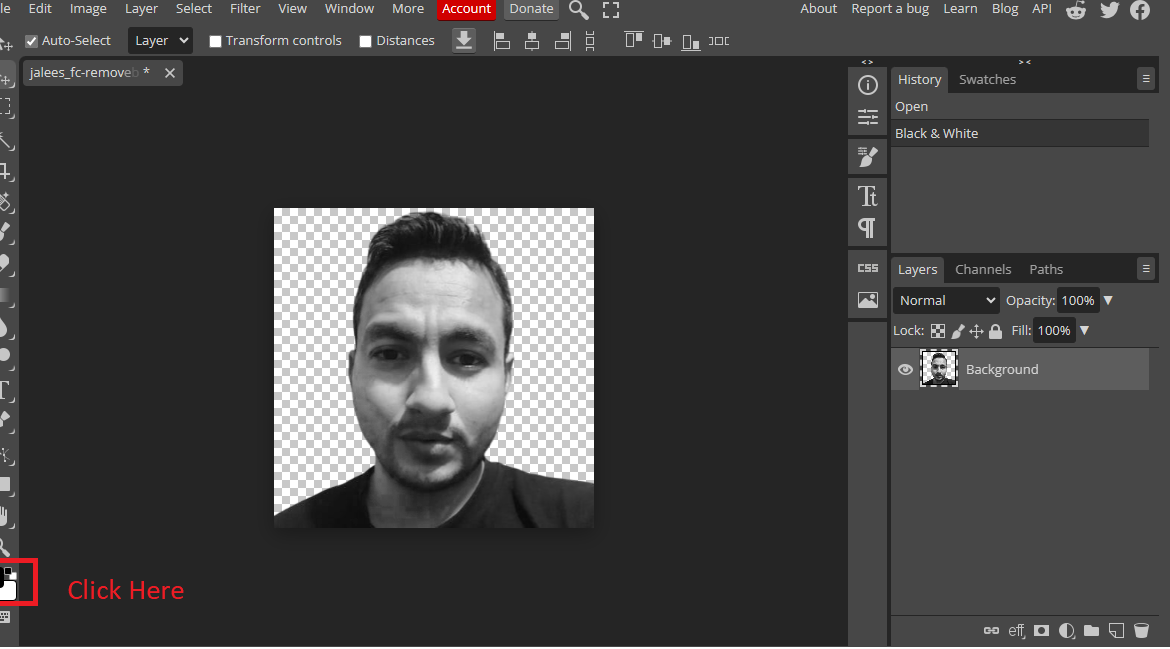
Step 2: Remove the Background
Clean up your selfie by removing the background. This step is essential to isolate the subject and prepare it for further manipulation. You can use ‘remove.bg’ to remove the background from the photo and it will looks like this now:

Step 3: Go to Adobe or photopea
Next, head over to your preferred editing platform, be it Adobe Photoshop or an alternative like photopea, to begin the creative process.
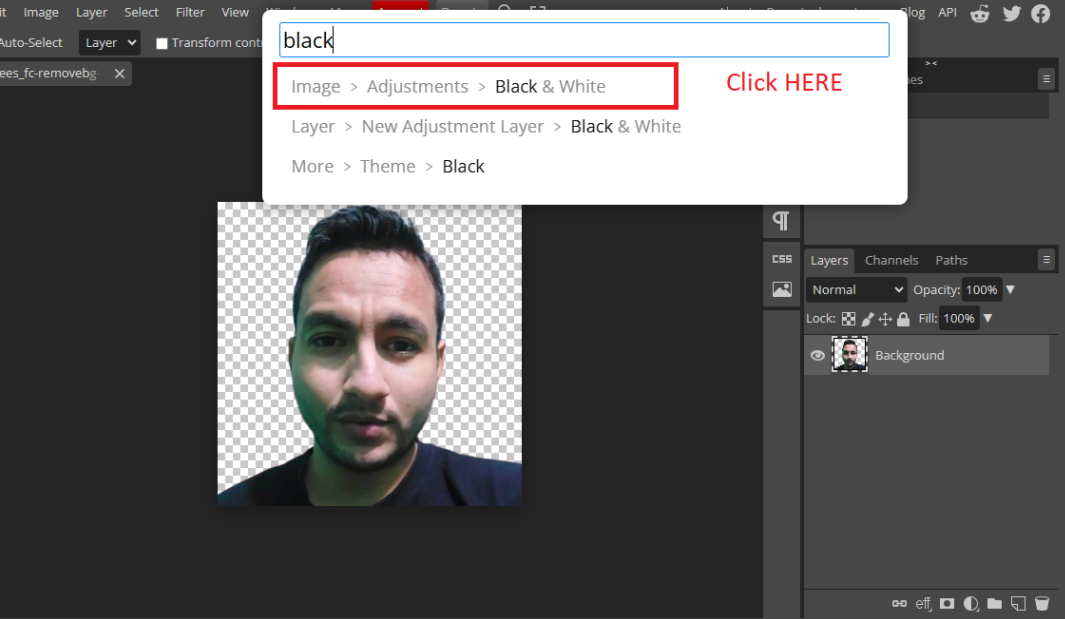
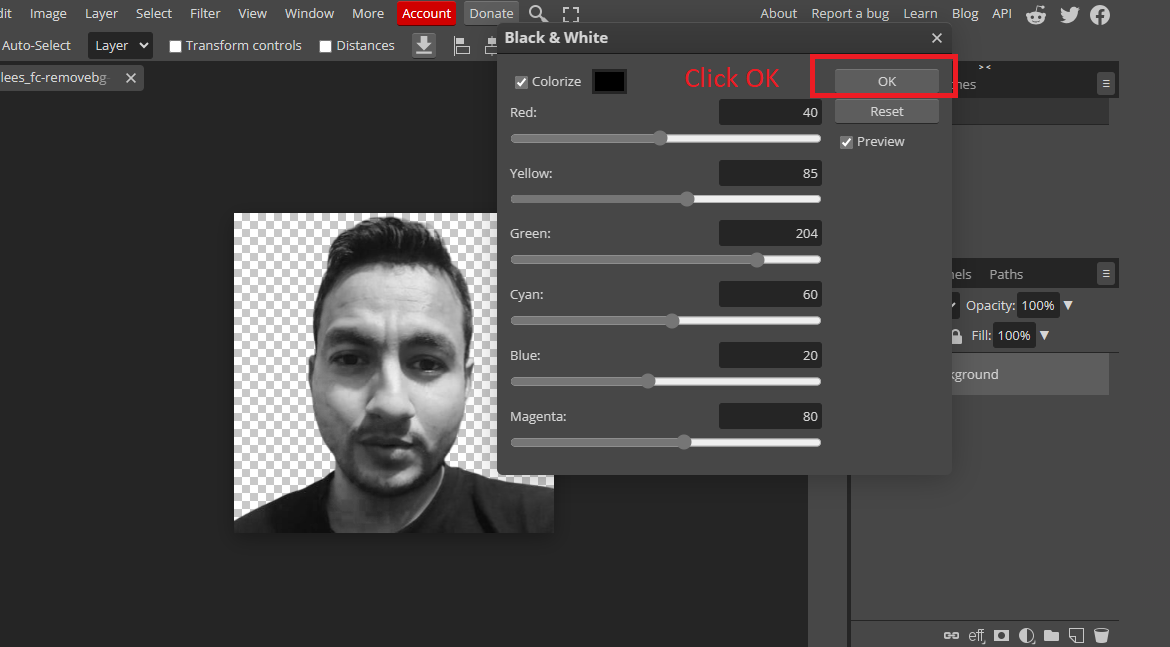
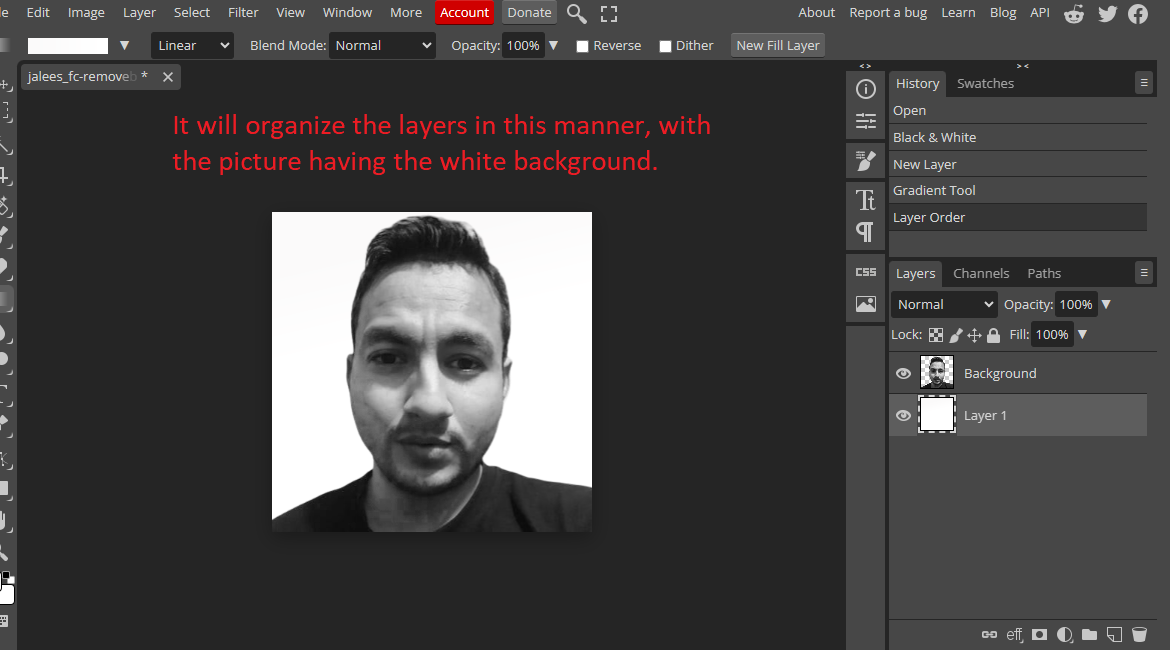
Step 4: Upload the Picture and Convert to Black and White
Upload your edited selfie and transform it into a black and white image. This classic look sets the stage for the hidden photo effect.
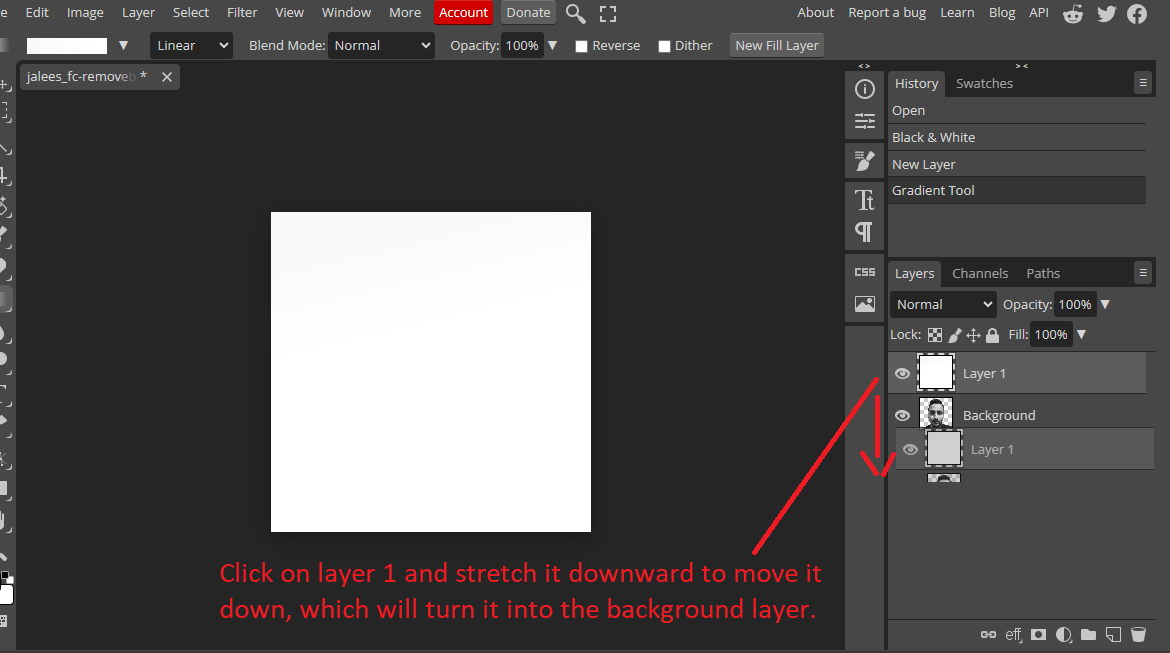
Step 5: Separate the Layers and Create the White Layer
In your editing software, separate the image into layers. Create a distinct white layer, which will serve as the canvas for the hidden photo.
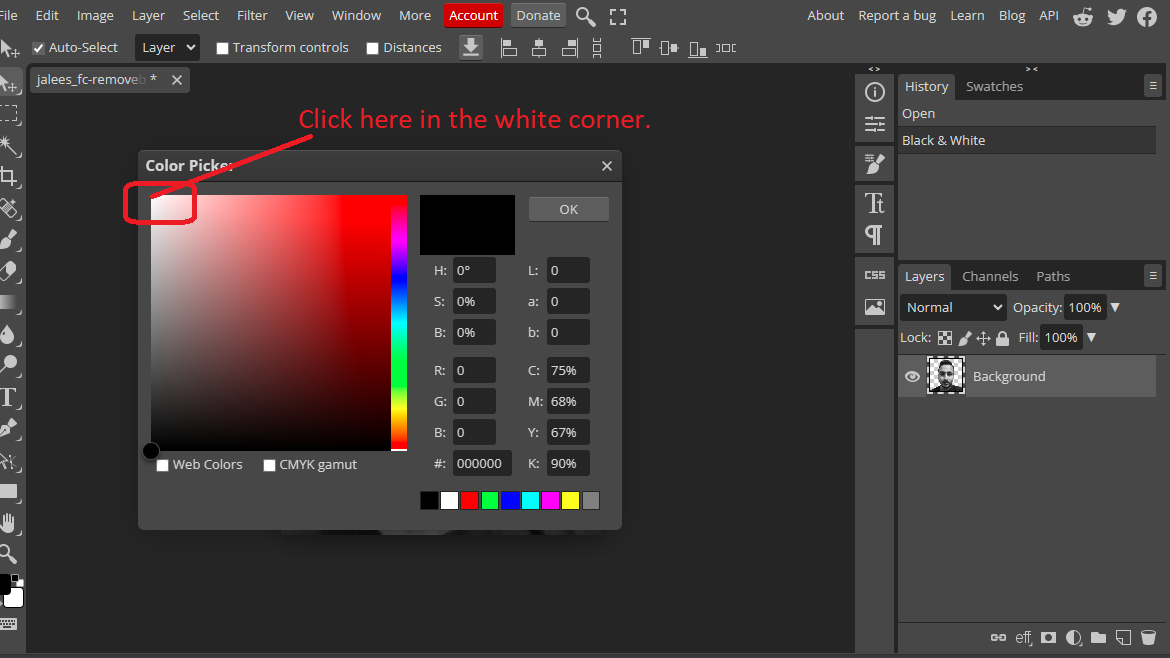
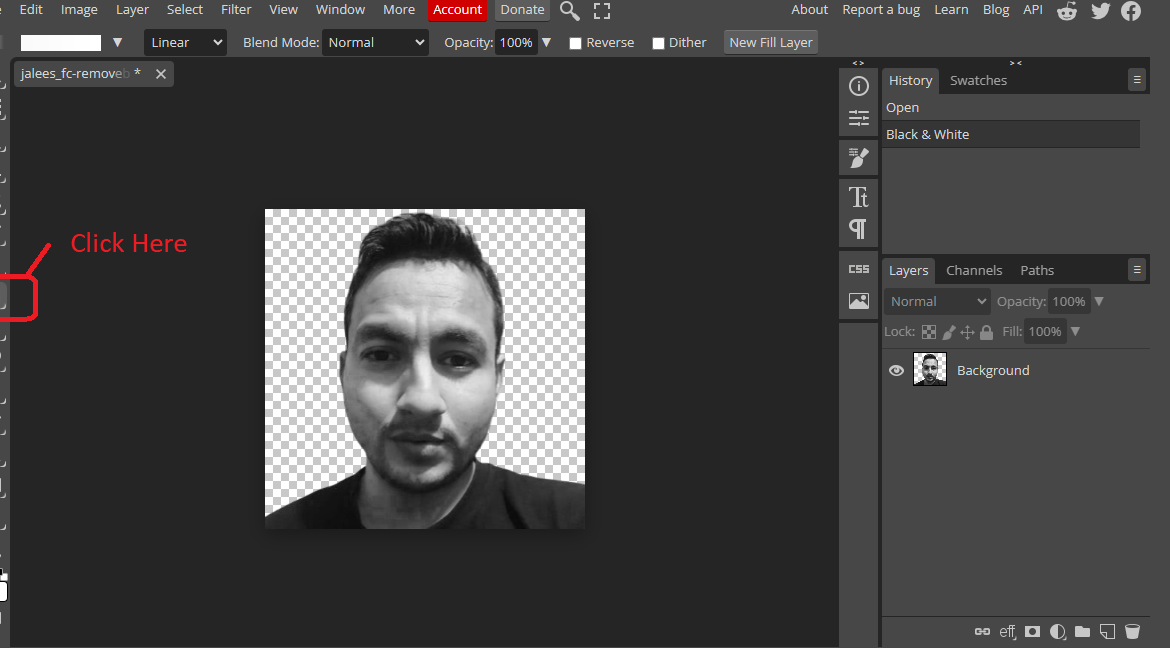
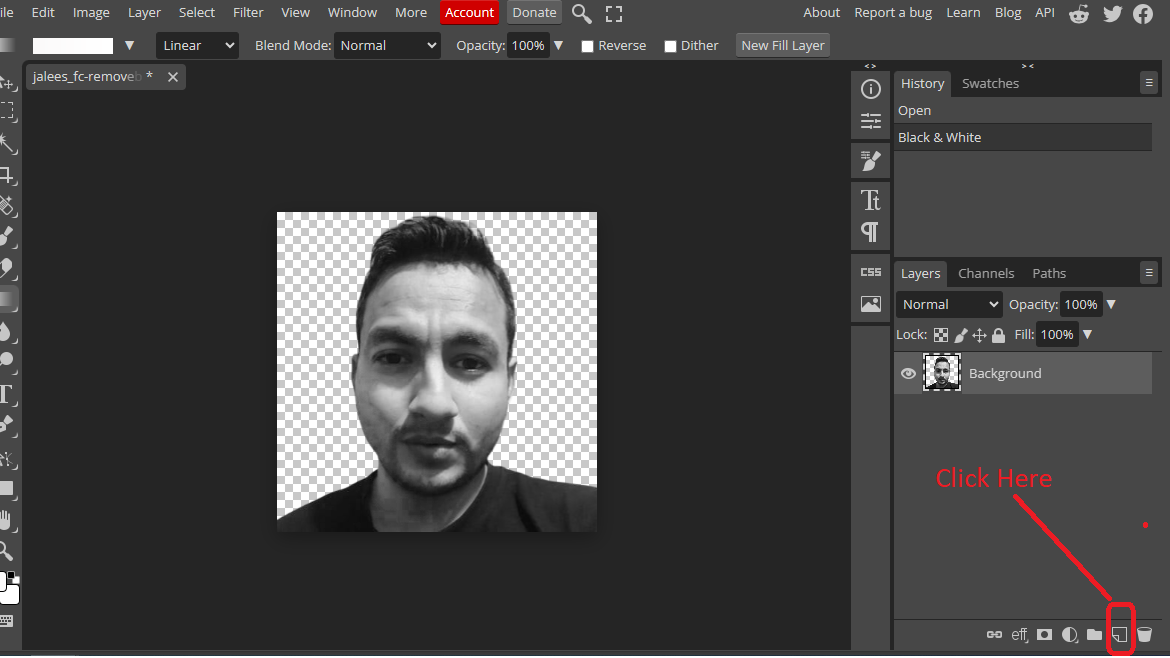

Step 6: Set the White Layer as the Background
Make sure the white layer is set as the background to provide a clean slate for your hidden photo to emerge.
Step 7: Adjust Contrast Levels (Optional)
If you desire, play with the contrast levels of the image to enhance the overall aesthetics. This step allows you to personalize your hidden photo further.
Then save this image:
Step 8: Visit AI Tools like quickqr.art and Create an Account
Now, it’s time to introduce some magic into your image. Visit AI-powered tools such as quickqr.art and create an account to access their unique features.
Step 9: Using quickqr.art:
a. Navigate to Fusion Art
Inside quickqr.art, find the Fusion Art feature. This is where the hidden photo creation process truly begins.
b. Upload the Picture
Upload your prepared black and white image as the base for the hidden photo.
c. Define the Prompt
Artificial intelligence often needs guidance, so define a prompt that aligns with the essence of your hidden photo. Think of it as the secret message you want to convey through your image.
d. Click on Generate
With everything set, click on the ‘Generate’ button. Watch as the AI blends your original selfie with the prompt, gradually revealing the hidden photo.
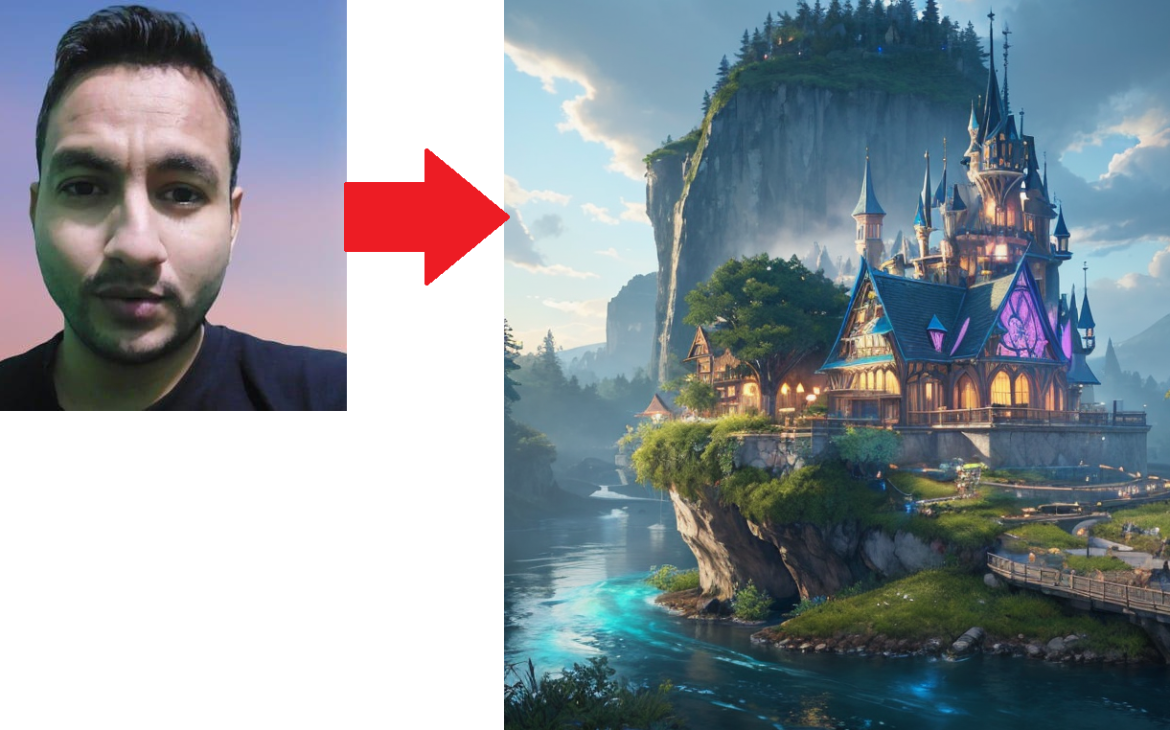
Step 10: Voila! Your Image Has Just Been Generated with a Hidden Photo of Yours
As the AI completes its work, you’ll witness your hidden photo emerge within the black and white canvas. The result is a captivating blend of nostalgia and contemporary artistry that truly makes your image one-of-a-kind.
In conclusion, the art of hidden photos combines modern technology with personal storytelling. By following these steps and unleashing your creativity, you can breathe new life into your photographs, transforming them into captivating pieces of art that encapsulate the past and present in a single frame. So, get started on your hidden photo journey today and share your unique creations with the world.